
1 Road Trip. 3 Weeks. 15+ States. 1 tiny car. Lots of gratitude.
If you’ve been following along, you know I’m no stranger to a cross-country road trip (and on a budget)! My first USA cross-country road trip was all about the southern heat—Boston to Florida, then cutting straight across the heart of the Southwest. But for Part 2, I wanted more of a “Great Northern Loop” type of vibe.
The Stats
- Timeframe: 2 – 3 weeks; Late September – Early October (The “Summer Extension” strategy).
- The Budget: ~$2,000 – $2,500.
- The Vibe: DIY, budget-friendly camping, and a heavy dose of cinematic nostalgia.

Although I mapped out 13 must-see locations in our atlas before we left, they were really just the skeleton of the trip. The actual journey was so much more than just lines on a page.
I’m going to break it all down for you—raw and unfiltered. I’m sharing the full details of every single stop, from the bucket-list destinations that lived up to the hype to the random, middle-of-nowhere spots we found along the way. No sugar-coating, just the real experience of life on the open road for three weeks.
🌎Traveling from outside the USA? If you’re coming from overseas to tackle a cross-country US road trip, listen up: US healthcare costs are no joke. Most international domestic plans won’t cover you once you land in the States. Between the long hours on the road and the high cost of American walk-in clinics, having a “Visitor Insurance” plan is a must. We recommend a plan that includes medical evacuation and high coverage limits so you can focus on the views, not the “what-ifs.”
my pre-trip checklist:
✨ Get an oil change
✨ Check washer fluid, brake fluid, coolant, etc.
✨ Inspect tire tread & air pressure
✨ Find your spare key — just in case!
✨ Choose destinations (or wing it, if you’d like!)
✨ Let friends & family know your route/stops
✨ Make sure your health insurance is in order
the full packing list:
Disclaimer: As an Amazon Associate, I earn from qualifying purchases. This doesn’t cost you a dime extra, but it helps me keep the site running and the itineraries free!
✨ Extra coolant, oil & washer fluid
✨ Variety of clothes/shoes
✨ Chapstick
✨ Hand sanitizer
✨ Wet wipes, napkins, toilet paper
✨ Plastic utensils & paper plates
✨ Cooler
✨ Laptop
✨ Kindle, books & coloring books
✨ Chargers for all electronics
✨ Batteries
✨ Mini fan
✨ An atlas
✨ Printed directions (in case you lose service)
✨ Lots of water and ice
✨ Caffeinated beverages
✨ Snacks
✨ Pillows & blanket
✨ Sleeping bag or air mattress
✨ On-the-go urinal bottle (who wants to stop every half hour?!)
✨ A bag of change — for tolls and parking meters
✨ Camera
✨ Hair ties
✨ Refillable bottles (shampoo, etc.)
✨ Medications, aspirin, antacids, etc.
✨ A positive attitude & an open mind!
Car Comfort:
One of the biggest lessons I learned from my first cross-country trip was that if you’re going to spend three weeks on the road, comfort isn’t a luxury—it’s a necessity. This time around, I made some serious upgrades to the car to make it the ultimate cozy retreat for those long stretches and naps at a rest stop.
The Sleeping Setup
Instead of just making do, I bought a 2-inch memory foam topper. I actually customized it by cutting it down to the exact dimensions of the back of the car. With the seats folded down, it fit like a glove, giving us a real bed feel rather than just a sleeping bag on a hard floor.
Privacy & Stealth
Privacy was a huge priority this time. I created custom window covers using thick black poster board cut to the exact shape of each window. For the windshield, I used a standard sunshade, but the real MVP was the black peel-and-stick vinyl for the hatchback glass. I got it on Amazon, and it’s amazing—it sticks right to the window with no residue, provides total privacy, and is completely reusable (and cheap).
Airflow & Atmosphere
To keep the air moving without inviting the local bug population inside, I used a magnetic screen that clipped right over the sunroof. It was perfect for those breezy nights. For lighting, I went with rechargeable and solar-powered fairy lights. They created such a vibe inside the car at night, and I even strung them around the tent when we camped out.
Power & Hot Meals
We were never low on juice thanks to an inverter box that plugged into the lighter socket. It had ports for everything—USB, USB-C, and regular outlets for my laptop or even a hair dryer.
But the best “budget” find? My portable heating lunch box. It’s basically a cheaper version of a bento-style heater that plugs into the lighter socket or the inverter. Being able to heat up a hot soup or a cup of tea in the middle of nowhere made the trip feel so much more convenient and “homey.”
☀️Holly’s Tip: The window covers were easily my favorite upgrade. We had to stop for naps during the day more than once, and being able to shut out the world and the bright sunlight made the car feel like a cozy, private bedroom no matter where we were parked.


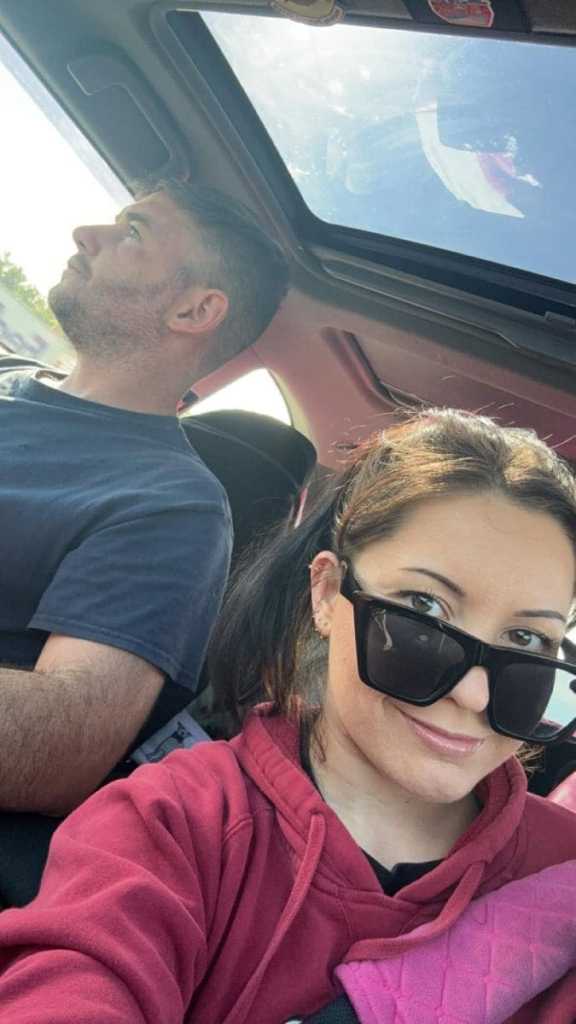
My husband (6′) was a little crammed but I (4’11”) slept like a rock 😅

We have a “thing” when it comes to long-haul trips: we always leave late at night (between 10:00 PM and 1:00 AM). The logic is simple—no traffic, and if we take a good nap beforehand, we can power through the night while the rest of the world is asleep.
We opened Waze and hopped on I-90 out of Mass, eventually transitioning to I-94 as we carved our way west. My husband is an absolute champ—he can drive straight through for about 18 hours before we switch off, so we didn’t stop too much. One quick nap in Ohio and we were back on the road.
😴Safety First: Since we switch off as soon as one of us feels sleepy, we can usually power through these massive stretches. However, we have one non-negotiable rule: If we both get tired, we pull over immediately. No exceptions. No exceptions. It’s never worth the risk.
- The Vibe Check: If a spot is pitch-black, deserted, or just feels sketchy, we keep driving.
- Rest Stops over Retail: Don’t bank on a random Walmart. Every state has different laws, and many cities have ordinances that ban overnight parking in retail lots.
- Safety in Numbers: We always aim for well-lit, busy rest areas right off the highway. Never park in a dark lot where you’re the only car.
Roughly 32 hours later, we hit Medora, North Dakota right as the sun was coming up. My husband was at the wheel while I woke up to one of the most beautiful sights I’ve ever seen. The sky was filled with soft, pastel colors, glowing over the Theodore Roosevelt National Park area.


We saw a pull-off on the Theodore Roosevelt Highway where a few other cars were parked, so we jumped out to stretch our legs and take it all in. Standing there, looking at the Painted Canyons with the Badlands stretching out in the distance, made every hour of that 32-hour drive worth it. What a beautiful start to our trip……

A lot of people ask why we didn’t go straight to the Badlands National Park in South Dakota. The truth is, we were on a mission to get to Washington and the West Coast as quickly as possible to hit the high-priority spots on our list. By taking the northern route through North Dakota, we got a stunning view of the Northern Badlands without adding extra days to the first leg of the trip.
Please note that the North Dakota Badlands and the South Dakota Badlands are not the same. Though they share similar geological origins. North Dakota features the rugged “Little Missouri Badlands” located in Theodore Roosevelt National Park, known for colorful, forested ravines. South Dakota features the dramatic, sharp-pinnacled Badlands National Park located near Rapid City.
It should also be noted that the North Dakota Badlands were right on the highway, meaning no park entry fees (unlike the South Dakota Badlands). Totally free!

After we left the North Dakota Badlands, we continued down I-94, which eventually transitions back to I-90 West for the long haul to Seattle. This stretch felt like driving through a series of paintings. Crossing into Montana, everything turned to gold—rolling hills, cattle grazing, and wide-open skies that seemed to go on forever.


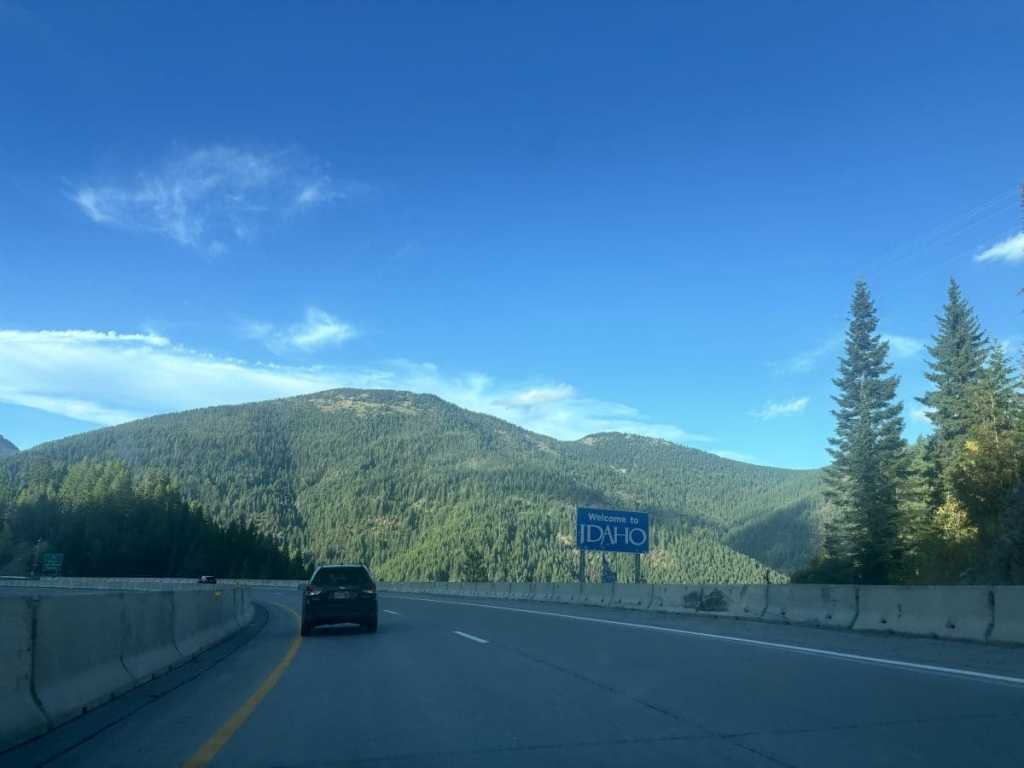
But as we hit Idaho, the landscape shifted again. The gold turned into deep, lush forest greens that reminded me so much of New Hampshire. By the time we crossed into Washington, it felt like we were finally in the heart of the Pacific Northwest.
The Blue Hour Arrival
We continued to drive straight through, arriving in Seattle, Washington around 6:00 AM. It was that magical “blue hour”—the sun was just starting to hint at the horizon, but the moon and stars were still out. Seeing the silhouettes of the mountains slowly sharpen as the sky got lighter was the perfect reward for an 18-hour push.

A Visit with a Legend
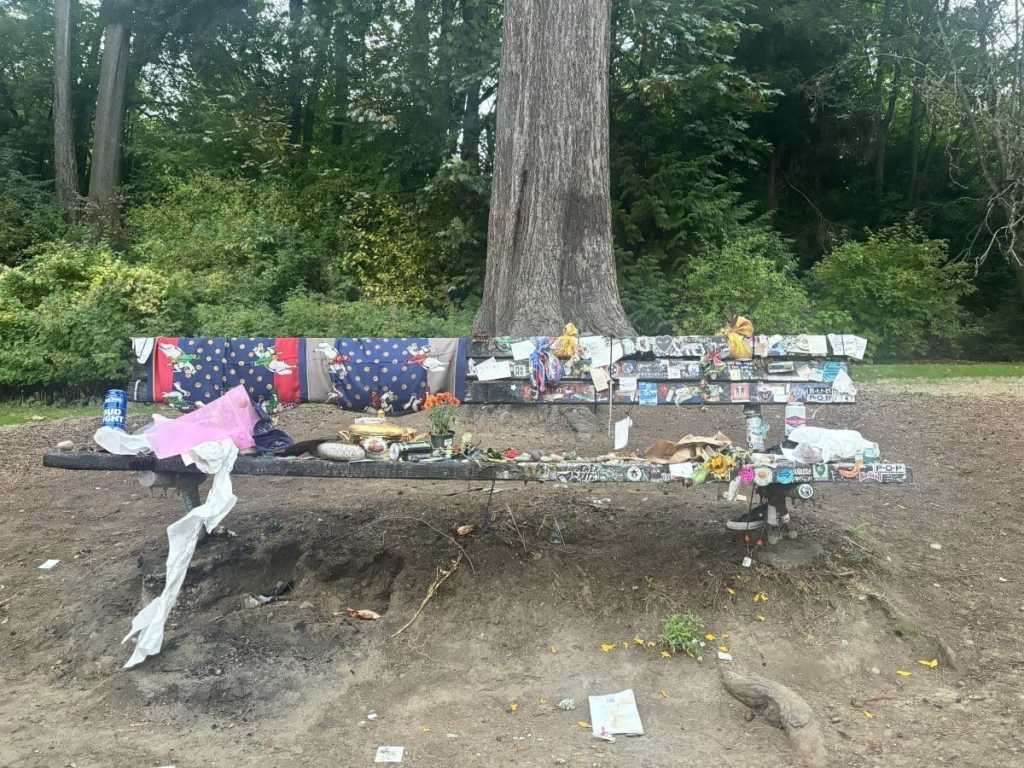
Since we were in the city, we had to make a stop for my husband. He’s a huge Nirvana fan, so we headed to the Denny-Blaine neighborhood to see the house where Kurt Cobain lived.
- The Park: We found free parking right down the street at Viretta Park, which overlooks Lake Washington.
- The Memorial: The house itself is private now and hidden behind massive, 30-foot-tall hedges, so you can’t see much of the property. But right there in the park is the famous memorial bench. It’s covered in signatures, lyrics, and little trinkets left by fans from all over the world. It was a really cool, quiet moment to just take it all in.
Westward Bound
We didn’t linger in the city for long. Seattle is great, but our hearts were set on the coast. After the park, we jumped back in the car and kept driving west. We had one very specific destination in mind, and for us Twilight fans, there was only one place to go.
Next Stop: Forks, Washington. 🌲🐺🍎

Leaving Seattle, it was a relatively short drive—just under four hours—before we saw it: the “Welcome to Forks” sign. As huge Twilight fans, this was a massive bucket list moment for us.

The Twilight Movie: Top Spots
Our first stop was the Forks Visitor Information Center (1411 South Forks Avenue). You can’t miss it because Bella’s red truck is parked right out front — actually, there’s two! It’s completely free to walk around and take pictures with the truck (obviously!), and they have a souvenir shop with some really unique finds.

“Bella, where the hell have you been, loca?” 🐺


Next, we headed to the Forever Twilight in Forks Collection (11 North Forks Avenue). This exhibit is a must-see because it has actual costumes and props used in the films. It’s free to enter (accepting optional donations), but they only let in groups of ten at a time, so you just sign up at the door and wait for your turn. Fun fact: You can even see the infamous “Chuckesmee” doll there—if you know, you know. It’s just as creepy in person!


We also swung by the Forks High School and grabbed a decent lunch at Home Slice Take N Bake before heading to the Treaty Line (7760 La Push Road). Standing by the sign that says “No Vampires Allowed” was such a highlight.


Side note: Forks, WA hosts the “Forever Twilight Festival” every year in September! We were not able to attend during our visit, but hope to come back someday to experience all the magic ✨
“La Push, baby, it’s La Push”
After grabbing some beer, snacks, and water at Forks Outfitters (950 S Forks Ave), we headed to La Push Beach to camp out for the night. This was about 20 minutes from Forks.
⛺Camping Permit Needed: There are a handful of spots within La Push — we camped at “Second Beach”, which you reach via a short, scenic hike through a lush forest of spruce and hemlock. You will need a wilderness permit beforehand, which can be purchased online ($11 per night).
The permit needs to be printed out, but you can call the ranger station (360-565-3100) if you don’t have access to a printer. The printed permit actually comes in two parts. One stays with you/your tent, and the other must be placed on your dash as a parking pass for the trailhead lot.
Get your camping permit here. Make sure you click off “South Coast” on the filter so you can scroll down and find “Second Beach.”


The Reality Check:
- Pack Light: The hike to the beach is downhill and easy at first but carrying a heavy cooler, a tent and sleeping bags through the sand is a workout. Remember: whatever you bring down, you have to lug back uphill the next morning when you’re tired and cold.
- The Setup: Don’t set up too close to the water! Look for the established fire pits and logs further back. Also, the wood was wet, so my husband had to head back out to buy firewood — don’t make the same mistake!
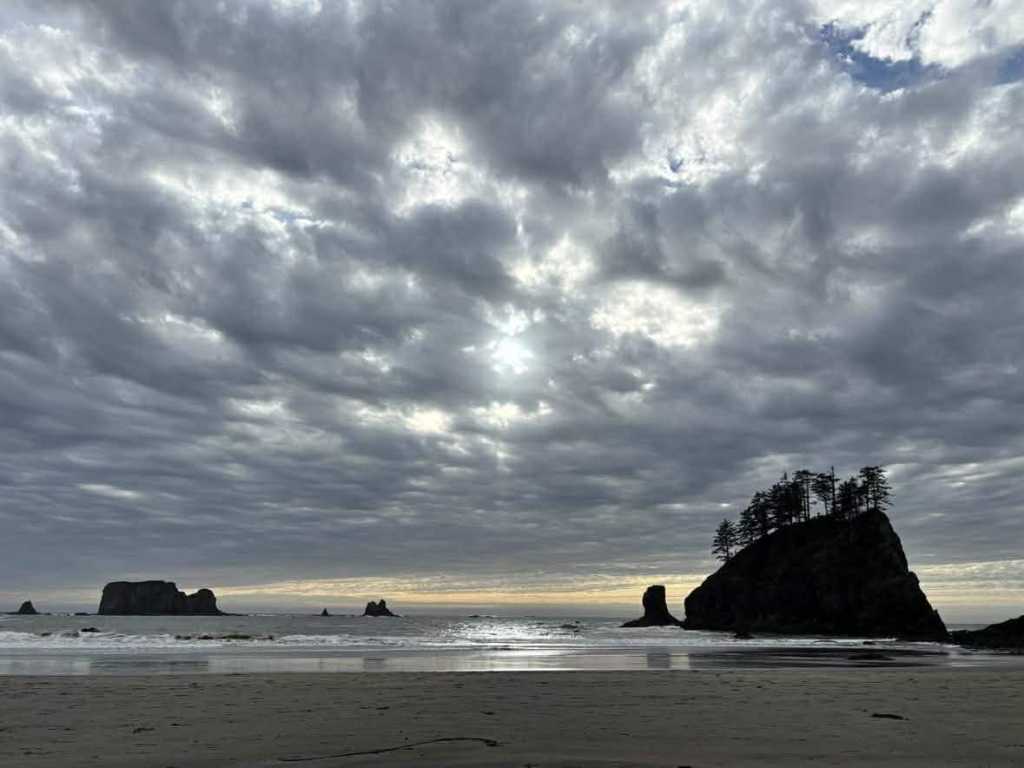
- The Weather: Even in late September, Washington is no joke. The clouds actually parted for us at sunset, giving us this breathtaking view of the rock formations (sea stacks) against the orange sky. But once that sun went down? It was freezing. Make sure you get that fire roaring!


The “Tent Tragedy”
We spent the night huddled by the fire, cooking chili dogs and listening to music. Since there’s no Wi-Fi, it was just us and the sound of the waves. It was beautiful—until morning.
The sea breeze and the mist had soaked everything. Our tent was caked in wet sand and moisture. In the freezing morning air, we realized there was no way we were drying this thing out or putting it back in the car. Real talk: We ended up tossing the tent and buying a cheap replacement at a local Walmart later. Sometimes, that’s just how the road trip life goes! ☀️😅 RIP to our black-out Coleman tent. I have gone through many tents throughout the years, and this was by far the greatest. It lasted 5 years and saw many places throughout the U.S.

After our chilly morning at La Push, we headed south to St. Helens, Oregon. This stop was a major nostalgia trip for me. Not only is it another huge filming site for Twilight, but it’s also the home of the 1998 Disney Channel classic, Halloweentown.
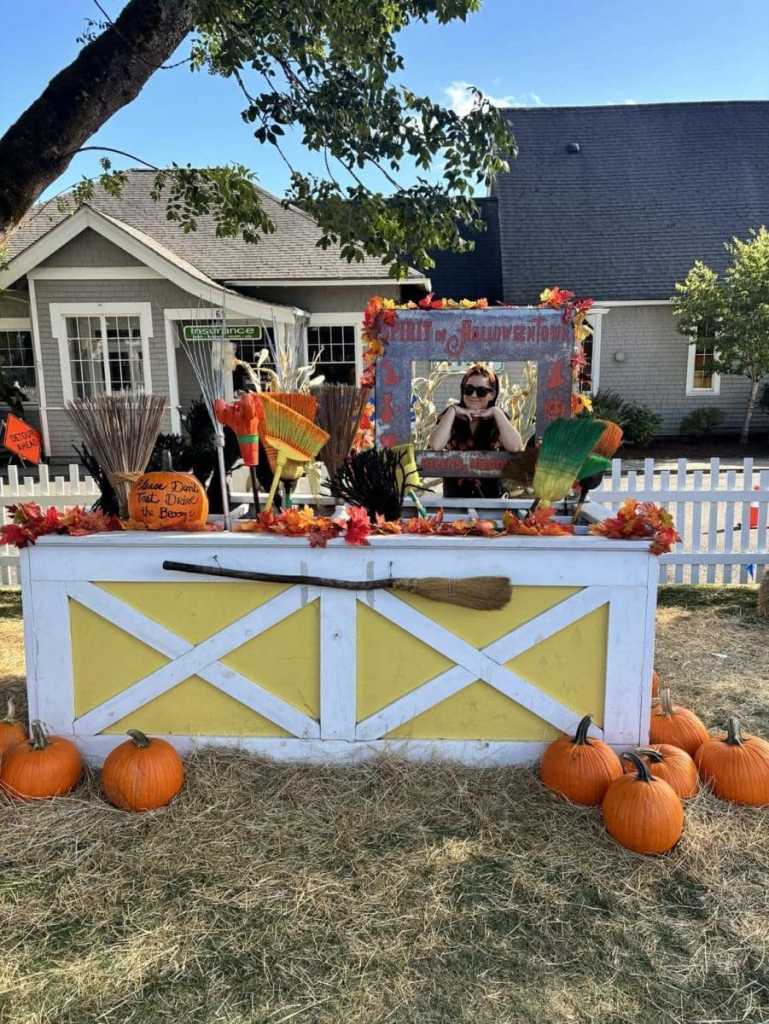
The Spirit of Halloweentown
Every year, the town transforms into the “Spirit of Halloweentown,” and it feels like stepping directly onto the movie set. We saw the iconic City Hall, the dentist office, and the old cinema. They even have the taxicab with Benny the skeleton behind the wheel and the famous bus stop!


The crown jewel is the massive pumpkin in the plaza. Taking a photo here is a must—there’s usually a line for professional shots, which generally cost around $20–$25 depending on the package, but having that memory of the “Halloweentown” centerpiece is worth every penny.

There were plenty of gift shops/stalls, various food trucks to choose from, and they have a dedicated beer garden area 21+ to enter.
The weather was absolutely perfect, and we thoroughly enjoyed walking around looking at all the cool props and shops. They also had a Museum of Peculiarities and Oddities, which had several interesting (and odd!) displays. It’s filled with alien exhibits, a gorilla, and even a deer head in a business suit. It definitely lives up to the name.


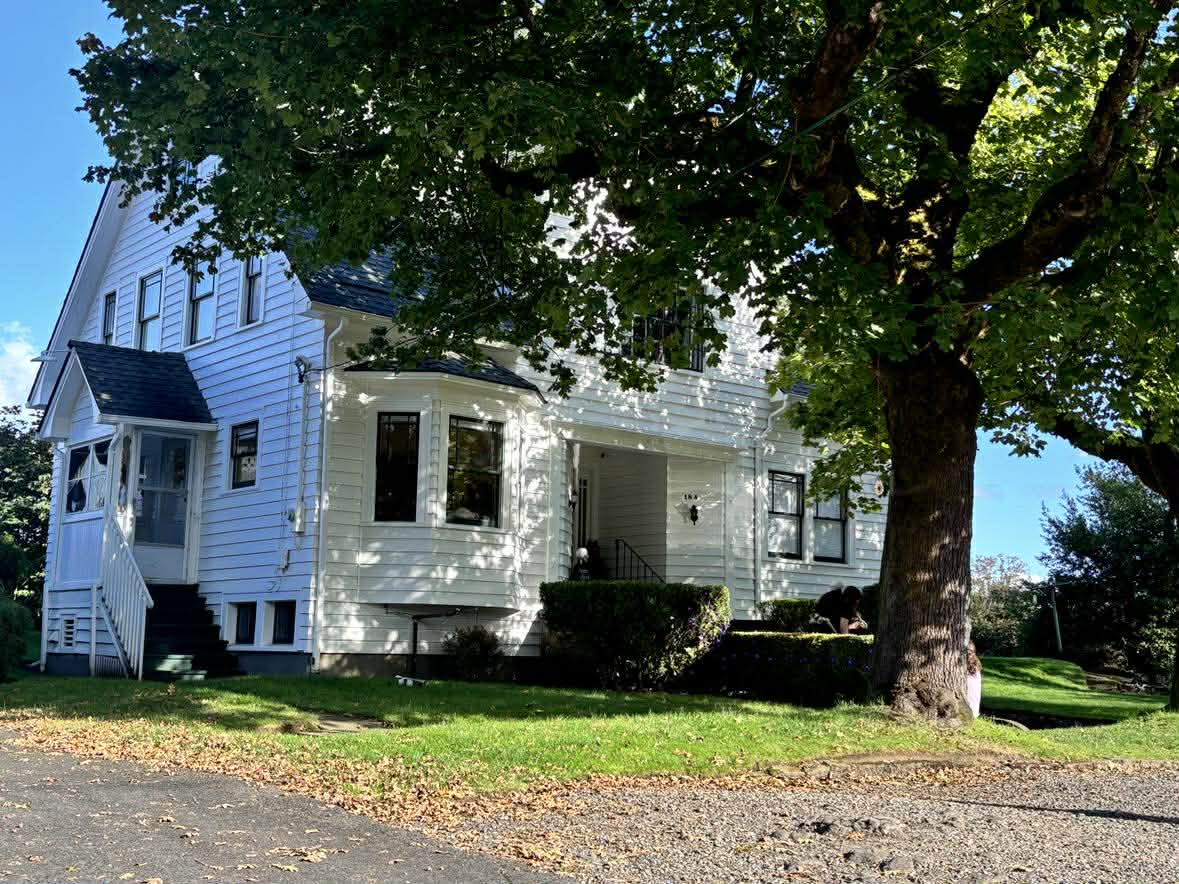
Visiting Bella’s House
Just a short drive from the town center (at 184 S 6th St), we found Bella Swan’s house. Since we were still riding that Twilight high from Forks, seeing the actual house from the movie was incredible. It’s now an active Airbnb, which means you can actually stay there if you book far enough in advance!
🍎Important Rules:
- Respect the Guests: People pay a lot to stay there, so be mindful of their privacy.
- The Street Rule: The owners are awesome and don’t mind photos, but they ask that you stay on the street/gravel area. Don’t go up onto the lawn or the porch.
- Keep it Quick: Take your photos and move along so the next person can get theirs. It’s a quiet neighborhood, so we made sure to be respectful.
We didn’t stay the night in St. Helens; after we got our fill of pumpkins and vampires, we jumped back in the car and started the long haul down toward Santa Cruz, California. We had another cinematic destination on our list: the boardwalk where they filmed The Lost Boys.

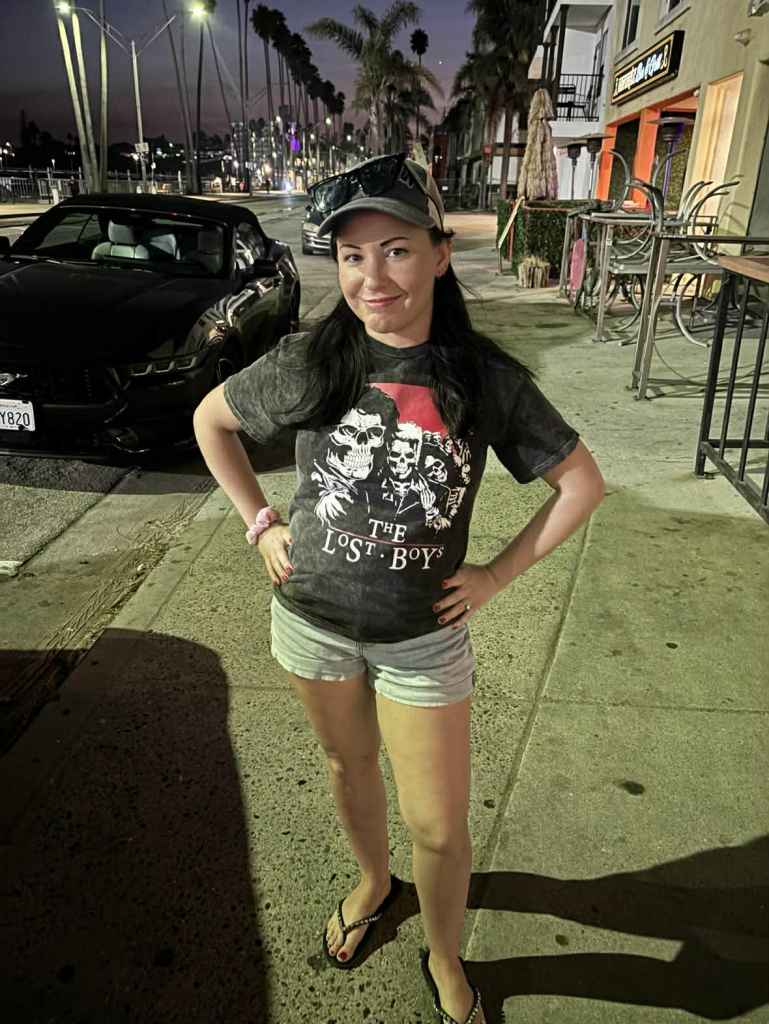
“One Thing About Living in Santa Carla…” is that Santa Carla doesn’t exist. While the movie The Lost Boys made that name legendary, the cult classic was actually filmed right in Santa Cruz, California. We couldn’t pass up the chance to trade the gloomy PNW woods for some California sun and see the real-life backdrops of one of the greatest vampire movies ever made. From the iconic Santa Cruz Beach Boardwalk to the pier, the whole city still radiates that gritty, neon, 1980s-cool energy that makes you want to look for David and his crew around every corner.
The Carousel Beach Inn
We rolled into town around 5:30 PM, just as the golden hour was hitting the coast. We checked into the Carousel Beach Inn, and honestly, the location couldn’t have been better. Our room was super clean, and because it’s right across from the Boardwalk, we had a perfect view of the rides and the ocean.
At $129 for the night, it felt like a steal—especially since they have a free parking garage. We spent a little time on our balcony with some drinks and snacks, just soaking in that fresh salt air before heading out to explore.


Walking the Boardwalk
Even though the amusement park rides weren’t operating the day we were there, it was still open for walking. It was actually kind of cool to see it without the massive crowds—it gave it that gritty, nostalgic 1980s feel from the movie. We spent the evening hanging out on the beach, walking the strip, and watching a killer California sunset with our seltzers in hand.


Dinner at Namaste Grill
By the time the sun went down, we were starving. We found Namaste Grill right next to the park. If you’re in the area, skip the typical carnival food and go here instead.
- The Food: We ordered the Chicken Marsala and a great Curry dish with plenty of Naan bread.
- The Vibe: The service was excellent, and the prices were really decent for being in such a prime tourist spot. It was the perfect warm meal after the sun went down.
from hangry to happy 🍛✨
After dinner, we headed back to the hotel to finally enjoy a real bed (our first hotel of the trip!). We snuggled up and watched movies, resting up for the next morning’s drive.

After a much-needed night in a real bed in Santa Cruz, we packed up and headed east. Our goal: the giant sequoia trees of Kings Canyon National Park in Three Rivers, California.

When we finally got to the gate, we didn’t have to pay a dime. My husband is a veteran and has the Military Lifetime Pass, which is a total game-changer for road trips. It covers the entrance fee for him and everyone in our car at any National Park in the country.
If you don’t have a veteran or annual pass, expect to pay $35 per vehicle. It’s valid for seven days and actually gets you into both Sequoia and Kings Canyon, which are “sibling” parks right next to each other.
Another option is to purchase the America the Beautiful Pass ($80), which covers entry to all national parks in the United States. It’s also good to know that these passes are free to U.S. citizens or permanent residents with a permanent disability—regardless of percentage. In addition, these passes offer discounts on amenities like camping.


The Great “Wrong Turn” (That Wasn’t)
Here is a “real-talk” moment for anyone planning this trip: Don’t turn around! When we entered the park, we saw… nothing. No giant trees. No lush greenery. It was desert-like, super hot, and full of rugged, dirt-colored mountains. We saw some beautiful rivers and waterfalls tucked between the rocks, but definitely not the ancient giants we were looking for. We honestly thought we were in the wrong spot and ended up turning back.
✏️ The Lesson Learned: I found out later that we made a very common mistake. Because of the elevation, you have to drive about another hour up the mountain from the entrance before the landscape shifts. Once you hit that higher elevation, the temperature drops, the “desert” disappears, and the massive sequoias finally appear.

Even though the day felt like a bit of a bust, the scenery was still rugged and beautiful in its own way—just not what we were expecting!

After the “missing trees” of Kings Canyon, we made the quick dash down to Los Angeles, California. My family lives in the Hollywood area, so we were super excited to get there and catch up on life!

Once we got settled, we headed out to Raffallo’s Pizza on N La Brea Ave. Since it was the beginning of October, the place was decked out in Halloween decorations, which really set the mood.
- The Vibe: It’s a classic Italian spot with great wine and even better pasta. It felt cozy and festive—exactly the kind of “welcome home” meal we needed.
- The Nightlife: After dinner, we grabbed some drinks at a spot nearby before heading back to rest up for the next day.
Universal Studios: Halloween Horror Nights
Aside from spending time with loved ones, the highlight of our LA stay was Halloween Horror Nights. As someone who lives for Halloween and all things horror, this was a massive bucket list item for me.


- The Experience: The jump scares, the haunted houses, and the overall production value were insane. It’s a completely different energy than your local haunted hayride.
- The Rides: All included in your horror nights ticket! $77 total.
- The Goal: I had the best time, but now it’s official—I have to get to the Orlando, Florida location one day to see how they compare!


Our favorite ride: Harry Potter and the Forbidden Journey

We left the Hollywood lights behind and headed back to one of my favorite places: the Extraterrestrial Highway (NV State Route 375). I’ve camped out here before, but I couldn’t wait to show my husband the weird, wonderful energy of the Nevada desert.

The Calico Detour
On the way, we pulled off at Calico Ghost Town in California. It’s a beautifully preserved 1880s silver mining town. We loved exploring the old cemetery and the “cave” structures (which are actually old mine tunnels—definitely creepy!). The town also has a full saloon, pharmacy, and restaurant to show you how life really was in the Wild West.


A Family Connection: We realized later that my husband’s father had visited this exact spot years ago. We found a photo of him standing in front of the same buildings we did. It was a cool “full circle” moment for us.

The Beatty Detour
The heat was no joke in Calico, so we hopped in the car and took off after a short while later. Eventually we got to Beatty, Nevada where we found a place to camp for the night.

We found this spot on freecampsites.net, and even though it’s technically “off the grid,” it felt incredibly safe. There was a small, established stone fire ring ready for us, and we could see the distant glow of a few other campers’ lights across the desert flats. Having that bit of visibility from others, while still having plenty of privacy, really let us relax and enjoy the silence of the Nevada night. 🌌🔥🛸

The next morning, we woke up with the sun and headed into the town of Beatty. The local celebrities there are the wild burros (donkeys) that roam the streets. They are adorable and totally fearless—one even leaned right into the car window for a head scratch! I couldn’t help but pet them, even if they were a little dusty from the desert.


Rhyolite & The Goldwell Open Air Museum
Just outside of Beatty, we hit another detour; Rhyolite Ghost Town and the Goldwell Open Air Museum. This place is a trip—it’s essentially an outdoor art gallery in the middle of a desert graveyard.
- The Sculptures: There are these haunting, life-sized white sculptures, including a “ghostly” bicycle rider and a group that looks like a spooky, desert version of The Last Supper.
- The Bottle House: We also checked out the Tom Kelly Bottle House, which was built in 1906 out of over 50,000 glass bottles. It’s a must-see if you love unique “oddity” architecture and Wild West history.


E.T. Phone Home 👽
The kitsch and mystery of the Extraterrestrial Highway (State Route 375) never get old, even on a second visit. After leaving the open air museum, we headed straight for Rachel, Nevada, the undisputed capital of alien hunting. We stopped for a quick burger at the Little A’Le’Inn, and while the food was just a basic roadside bite this time around, the atmosphere is unbeatable—the ceiling is covered in dollar bills, and the walls are plastered with alien “evidence.”


We also spent some time browsing the gift shops, including the Area 51 Alien Center, where we stocked up on some truly weird souvenirs like “Alien Blood” and “Birds Aren’t Real” stickers. It’s the kind of place where you just have to lean into the weirdness before disappearing back into the quiet of the desert.


Camping at Upper Pahranagat Lake
After exploring Rachel, NV, we finished our day at a beautiful spot in Alamo, Nevada, at the Upper Pahranagat Lake Campground.

The Upper Pahranagat Lake Campground is a real hidden gem for a budget-friendly road trip.
- Cost & Availability: The 15 lakeside sites are completely free of charge and available on a first-come, first-serve basis. They do have a donation box at the registration kiosk if you want to support the refuge.
- Facilities: These are primitive sites, meaning there are no electrical hookups, water, or waste facilities. However, they do provide vault toilets (no flush) for campers.
- Site Features: Each site comes with a picnic table and a fire pit/grill. Since the refuge is a sensitive area, they ask that you only use the provided fire rings and don’t build your own out of rocks.
- Rules to Know: You can stay for up to 14 days in a 31-day period. Quiet hours are from 10 PM to 7 AM, so if you’re using a noisy generator, it’s best to shut it down overnight to keep the lakeside vibes peaceful for everyone.


We left the peace of Upper Pahranagat Lake and headed south toward Phoenix, Arizona. My main mission for this leg was to show my husband the legendary Saguaro cacti, but I quickly realized I had my desert geography a little mixed up.
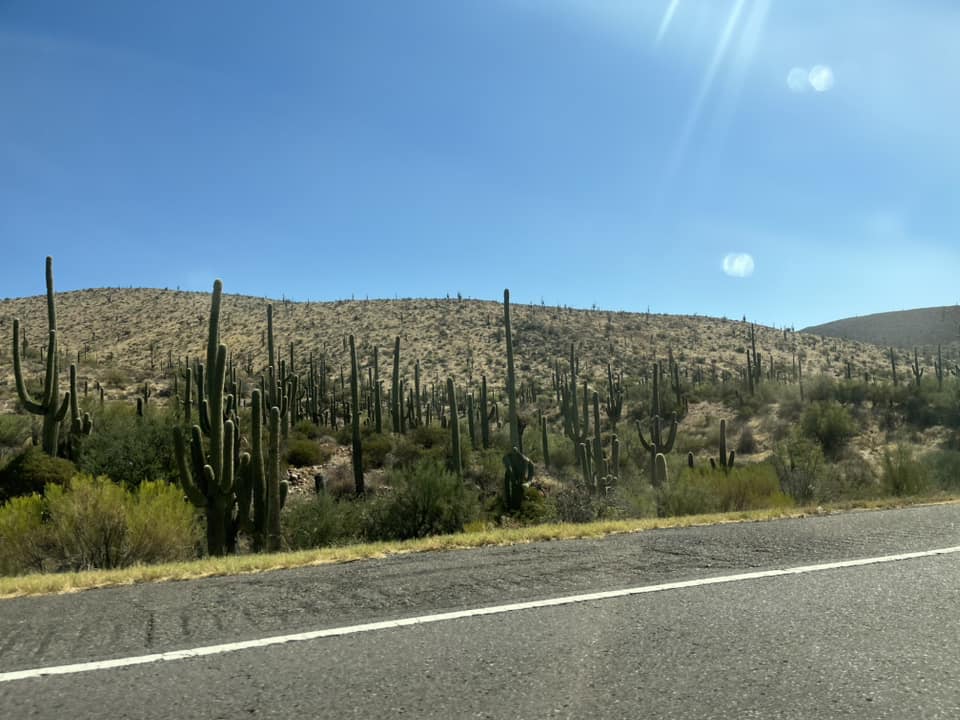
The Great Cactus Mix-up
While we definitely saw plenty of cacti around Phoenix, it hit me halfway through the drive that the massive, towering Saguaros I remembered from my first road trip were actually in Tucson. If you’re looking for the giant “arms” and that iconic Western silhouette, Tucson (and Saguaro National Park) is where you want to be. Phoenix is still beautiful, but it’s a different vibe!

Survival Mode: 110 Degrees
The desert was not playing around—we rolled into town in the middle of a massive heatwave. The thermometer hit 110°, and it felt every bit of it. We decided to trade the tent for a night of air-conditioned luxury and checked into the Holiday Inn & Suites Phoenix-Mesa/Chandler.
- The Hotel: At around $122 for the night, this was exactly what we needed. The hotel was very clean and had a beautiful outdoor area.
- The Pool & Hot Tub: Even after the sun went down, the heat was still intense, so we spent the evening in the pool. They had lights strung up around the courtyard that made the whole place look really cool at night. We even braved the hot tub for a bit!


Having a real bed and a great pool to reset in made the 110-degree day totally bearable. We didn’t hang around too long the next morning, though—we packed up early to beat the sun and started the drive toward New Mexico.
Next stop: Albuquerque to find a very famous house. 🧪🏚️🚗

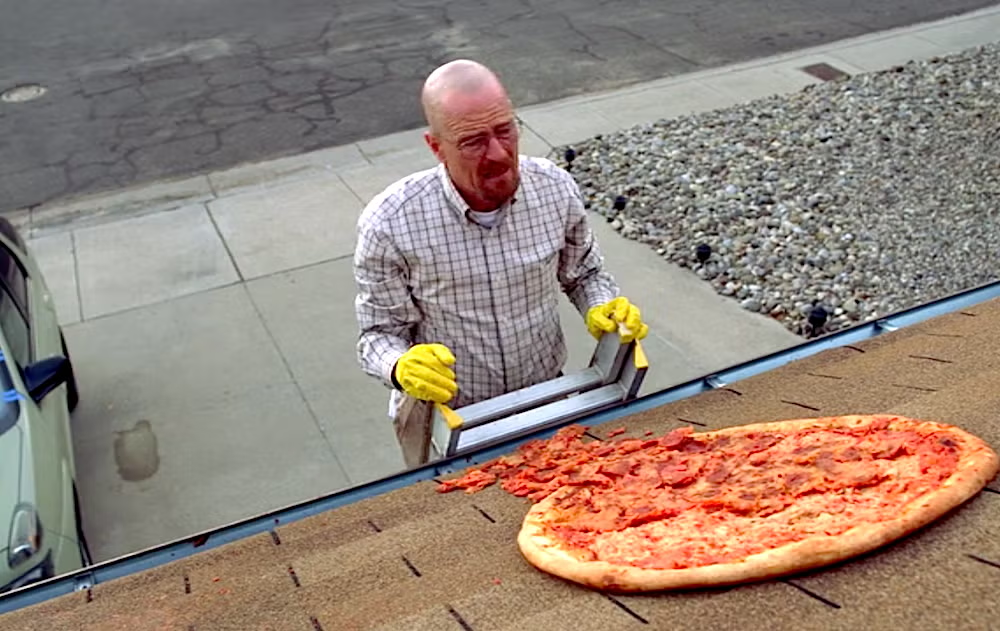
We left the Phoenix heat behind for a seven-hour trek (which turned into eight with gas and snack breaks) to Albuquerque, New Mexico. As a huge Breaking Bad fan, I couldn’t pass up the chance to see the iconic Walter White house (3828 Piermont Dr NE).
A Less-Than-Warm Welcome
We’d heard stories about the owner being a bit… intense with fans, and she definitely lived up to the reputation. We didn’t even stop—we just drove by slowly to look—and she was already in her driveway yelling at us. We didn’t have cameras out or anything (it was dark), but after years of people throwing pizzas on her roof, I guess she was just on high alert.
I managed to snag a quick video on our second loop around, but we made sure to keep moving. It was definitely a bit of a “bust” in the moment, but the drama of it all almost felt like being in an episode of the show!
New Era for the White Residence
Fun Fact: If you’re planning a trip here now, you’ll probably have much better luck. That owner finally sold the house in February 2026 to a streamer named Adin Ross.
Word on the street is that he’s turning it into a total 1-to-1 replica of the home as it appeared on screen—including the interior and even recreations of the infamous “pizza on the roof” scene. It might even become an Airbnb or a museum one day!
Real-Talk Advice: Even with a new owner, if you visit, just be respectful. It’s still a residential neighborhood, and nobody likes a snoop in their front yard at 3 AM.

After the drama in Albuquerque, we crossed into Colorado and parked at a rest stop for the night. In the morning, we headed toward the Great Sand Dunes National Park. But before we tackled the dunes, we found the perfect “reset” button just down the road.
The Greenhouse: A Desert Oasis
We stopped at The Greenhouse at Sand Dunes Pool in Hooper. If you’re on a long road trip, put this on your list. It’s an indoor tropical terrarium filled with plants, hot springs of all different temperatures, a sauna, and—the best part—a bar. We grabbed a few drinks and let the road weariness melt away. It was the perfect, refreshing break before the physical work began.
Please be aware that while the main outdoor pool is great for families ($18 for adults, $12 for kids/seniors/military), we spent our time in The Greenhouse. It’s a 21+ tropical oasis that costs an additional $7 to enter, and it is worth every penny. Inside, you’re surrounded by lush plants and four different soaking pools with temperatures ranging from 98 to 111 degrees. We grabbed a few drinks at the Steel Box bar and hit the sauna to fully recharge. It was the perfect adults-only escape to reset our bodies and minds before hiking and camping out again.


⚠️ Important Note for Your Visit: Before you head out to The Greenhouse at Sand Dunes Pool, keep in mind that they are closed every Thursday for deep cleaning. Plan your road trip accordingly so you don’t miss out on that soak! 🧼🚫✨
The Dunes: A Strenuous Trek
Once we reached the park, we used my husband’s Military Lifetime Pass to get in for free (otherwise, it’s $25 per car). We headed to the Visitor Center to grab our overnight backcountry permit ($6).

While we chose the “strenuous” adventure of the backcountry dunes, the park also offers the Piñon Flats Campground for $20 per night. It’s located just a mile north of the Visitor Center and provides actual amenities like fire grates, picnic tables, and—best of all—restrooms with flush toilets and sinks. Unlike the $6 backcountry permit we got to sleep out in the sand, Piñon Flats is accessible by car, so you don’t have to carry your life on your back to get there! Just keep in mind that those sites book up fast, so you definitely want to reserve them on recreation.gov ahead of time.


Real-Talk Advice: We rented a sandboard for $20, thinking we’d be sliding down the dunes all evening. Total waste of money for us. Between our tent, sleeping bags, and a cooler bag, we were already carrying a ton of weight. Hiking up the dunes is a serious workout—every step forward feels like half a step back in the loose sand. By the time we found a spot tucked between the dunes for privacy, we were too exhausted to even think about boarding. If you want to sandboard, do it before you pack in for the night!
A Night Under the Stars (and Ice)
The effort was worth it, though. Camping deep in the dunes felt like being on another planet. It was incredibly peaceful with the moon and stars lighting up the sand.
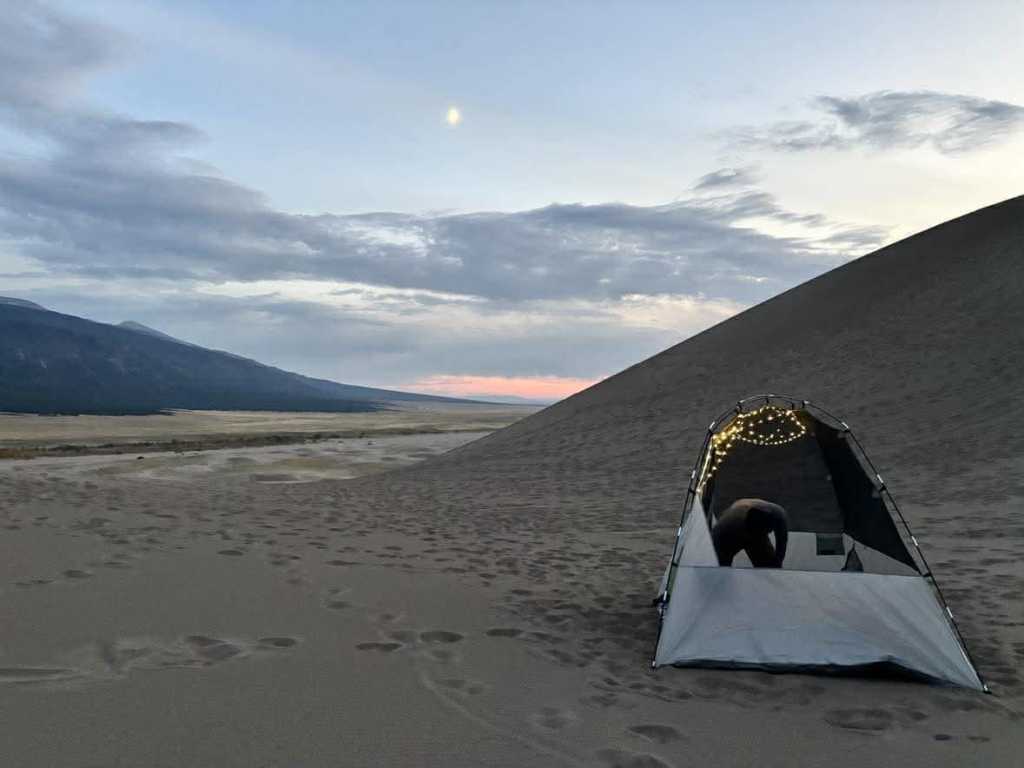
The Catch: It was freezing. Even with our sleeping bags, we spent the night snuggled up just trying to stay warm. The temperature drops fast out there, so if you do this, bring more layers than you think you need!
We woke up sore but proud that we actually hiked and camped in the tallest dunes in North America. We didn’t waste any time the next morning—we packed up and headed back to the car, ready for the next adventure!


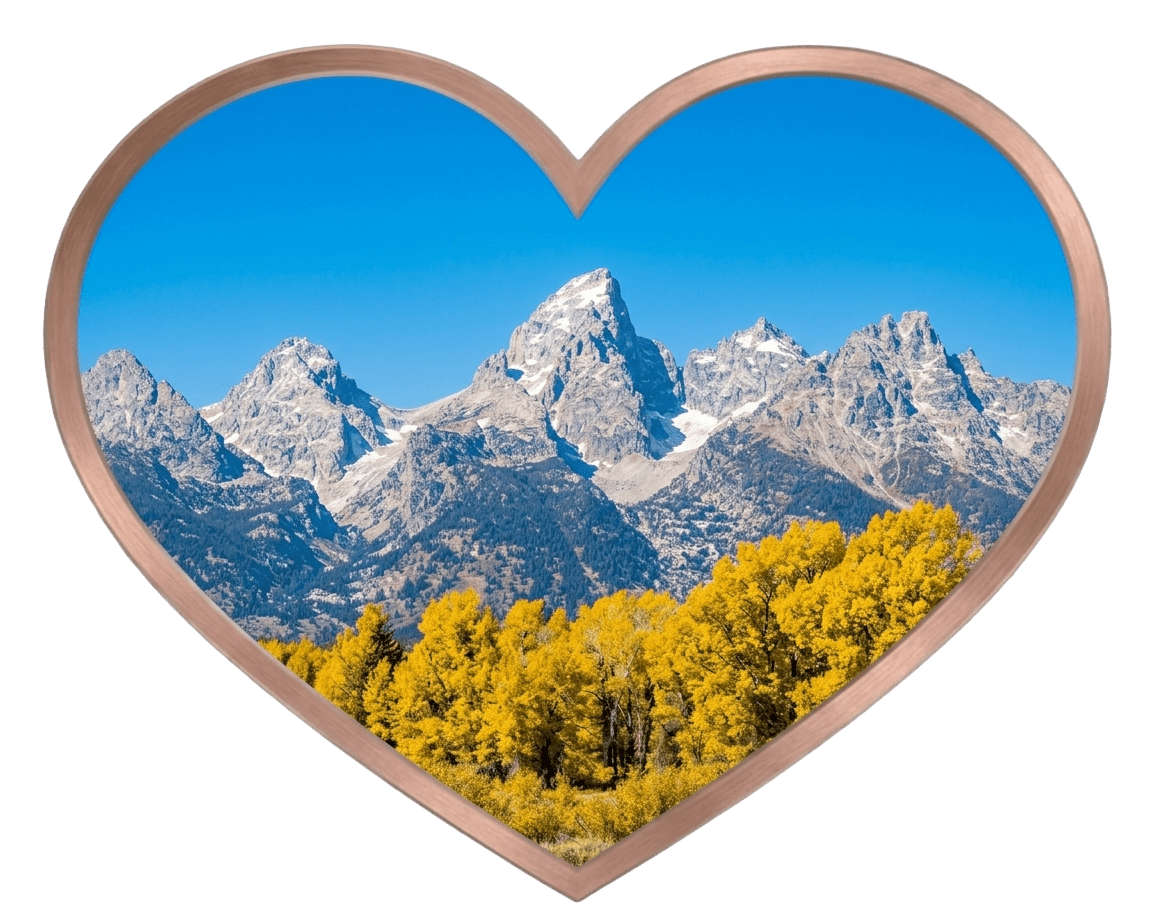
After freezing our way through the night in the Sand Dunes, we pointed the car north. We skipped the Tetons on the way out west, but there was no way I was missing them on the way back home.
The “Hills Have Eyes” Detour
As the sun dipped below the horizon, exhaustion finally hit. The plan was to snag a free spot for the night, but a set of GPS coordinates from freecampsites.net led down a hauntingly quiet dirt road. In the glow of the headlights, a dilapidated trailer appeared alongside a pair of eerily glowing eyes. While the eyes (I thought were a grizzly bear) turned out to be just a cow, the vibe was undeniably off. Trusting your gut is a travel rule for a reason—a quick U-turn and a rest-stop nap felt much safer than that creepy clearing.
🏕️ A Note on Using FreeCampsites.net: While this site is an amazing resource for finding hidden gems, remember that it is community-driven. This means everyday people—not park rangers or officials—are the ones posting the spots and coordinates.
Because anyone can add a location, some spots might be outdated, on private property, or just plain sketchy. If you pull into a site and it feels “off,” like our encounter with the broken-down trailer and glowing eyes, don’t stay. Always have a backup plan (like a nearby rest stop or hotel) and try to arrive before dark so you can scout the area properly. Your safety is worth more than a free night’s stay!
Grand Teton National Park
We rolled into the Tetons around 9:00 AM, and the views were phenomenal. The leaves had turned a vibrant yellow, and the air was crisp and cold—it honestly felt like we were back in the Northeast.
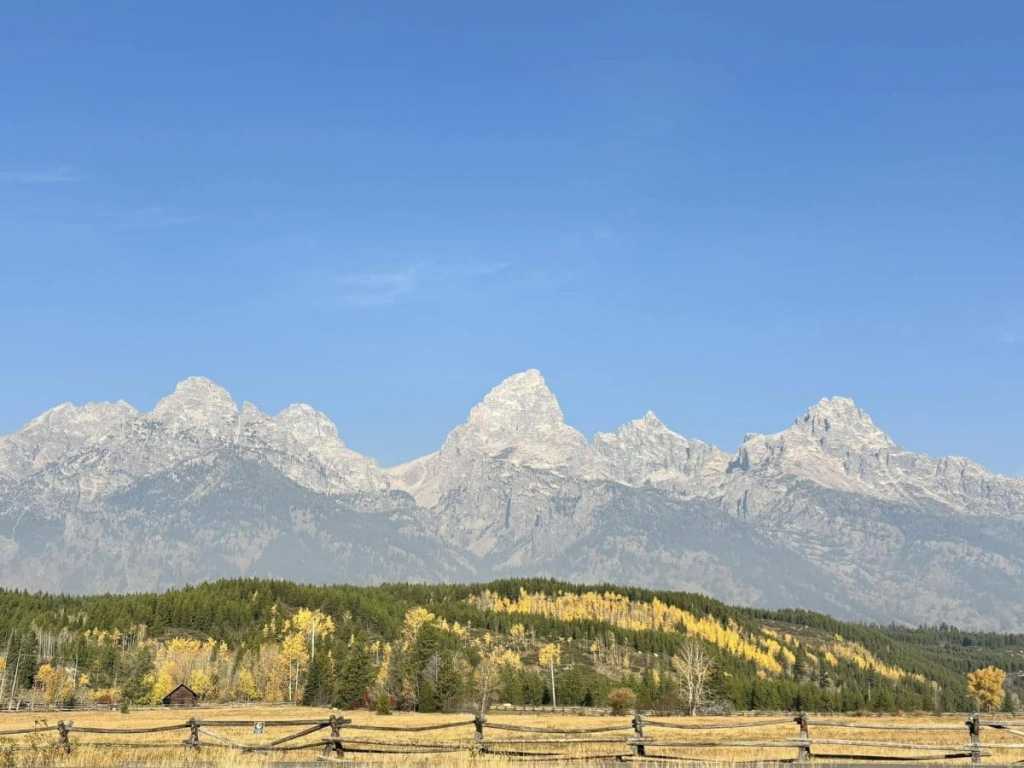
If you aren’t using a military pass, entrance is $35. The park rangers give you a great map that marks all the scenic pull-offs. The peaks are so jagged and massive, they don’t even look real.
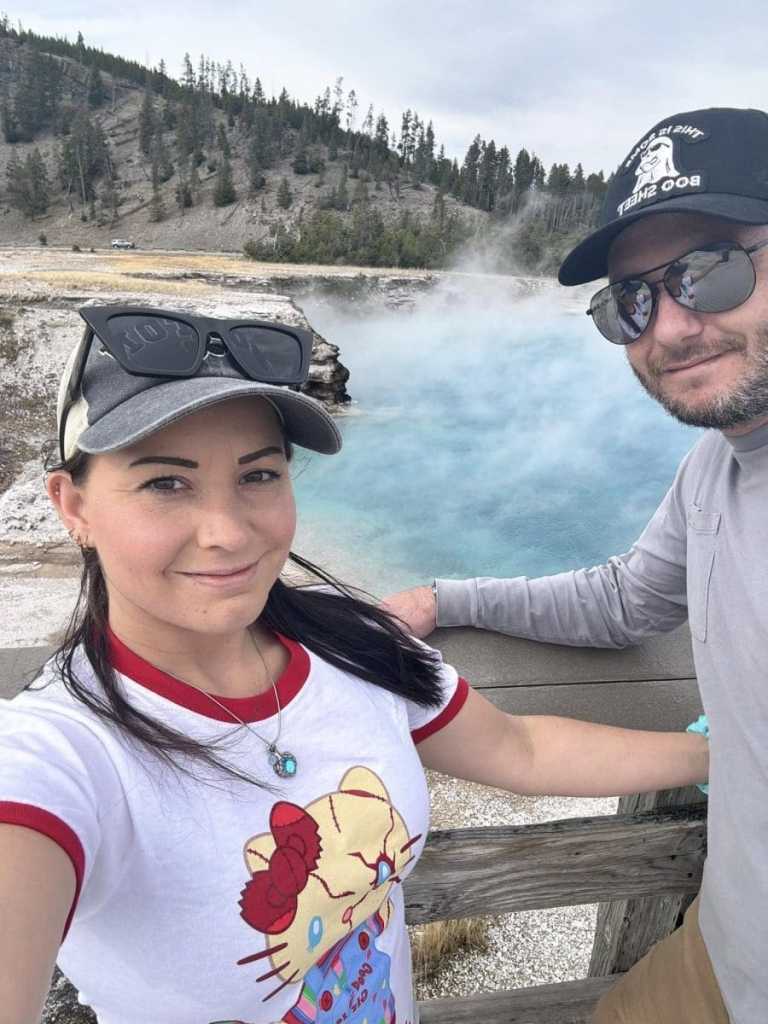
Yellowstone: Geysers & Bison Jams
Since they are basically neighbors, we headed straight into Yellowstone National Park the same day ($35 entrance fee for non-pass holders).


- Old Faithful: We caught the eruption—it happens roughly every 94 minutes. Watching that much power shoot into the air is something you have to see at least once.
- The Wildlife: We got caught in a total “Bison Jam.” These massive Bison (often called Buffalo) were roaming right next to our car and crossing the road. Seeing them that close to the window was easily one of the coolest experiences of the entire trip.
- The “Grand Canyon” of the Yellowstone: Don’t confuse this with the one in Arizona! This canyon is 20 miles long and carved into stunning, yellow-toned rock.
- The Waterfalls: You have to see the Lower Falls—it’s 308 feet tall, which is actually more than twice the height of Niagara Falls! There are plenty of lookout points where you can get that “perfect” shot of the water crashing into the canyon.
- Hot Springs: These are the most common. You’ll see pools like the Grand Prismatic Spring, which is famous for its rainbow of colors caused by heat-loving bacteria.

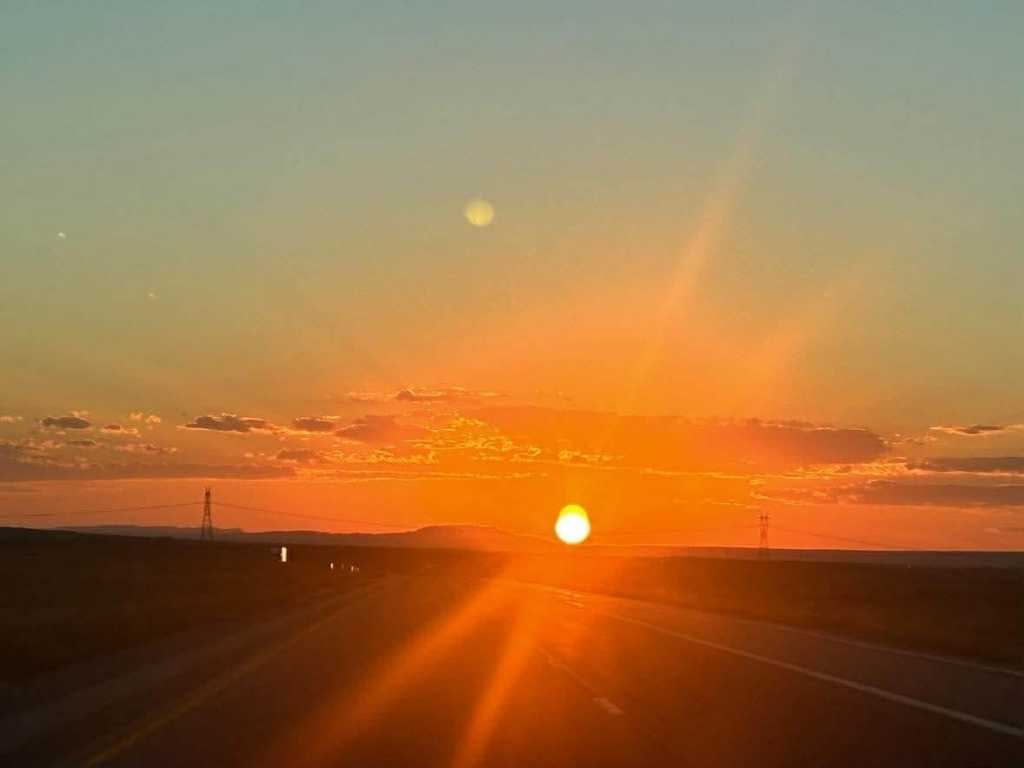
As the sun set on our last National Park day, we started the long journey back to Boston. We were exhausted, but the universe had one last gift for us. While driving through South Dakota near Rapid City, the sky lit up with the Northern Lights. Seeing that green glow over Route 90 was the perfect “period” at the end of our cross-country sentence.


“I will love the light for it shows me the way; yet I will love the darkness for it shows me the stars.” — Og Mandino✨
After roughly 36 hours of driving and crossing through the heart of the country, we finally pulled back into our driveway in Massachusetts. We were thankful to have made it back safely. And we were thankful for all the places we got to see 🩷
The Final “Unfiltered” Budget: 7,500 Miles Later
| Category | Estimated Cost | The Details |
| Gas | ~$900.00 | Calculated via calculator.net. |
| Hotels | $251.00 | Mesa Holiday Inn ($122) & Carousel Beach Inn ($129). |
| Tolls | $150.00 | I-90 and various state electronic tolls. |
| Halloween Horror Nights | $180.00 | $70 per person + $40 for spooky snacks. |
| Dining Out | $220.00 | Namaste Grill (~$100), Mexican dinner (~$60), and various lunch stops (~$100). |
| Daily Food & Snacks | $150.00 | The “Cooler Life”—sandwiches, gas station snacks, and basics. |
| Alcoholic Beverages | $60.00 | Drinks at the Greenhouse and various evening resets. |
| Activities & Exhibits | $109.00 | Sandboard Rental ($20), Greenhouse Pool ($38), Halloweentown Photo ($20), Museum of Oddities (~$15), Sand Dunes permit ($6), and donations ($10). |
| Gear & Maintenance | $60.00 | Emergency Tent Replacement. |
| Souvenirs | $40.00 | Keepsakes from the road. |
| Park Entry | $0.00 | Military Lifetime Pass (Saved ~$150+ total). |
| TOTAL | $2,120.00 | Final Tally! |
The Hidden Cost: Tolls & Electronic Billing
When you’re crossing 7,500 miles, you are bound to hit tolls. We started right at home on I-90 in Massachusetts, which is entirely electronic, and hit several others through the Midwest and Northeast.
What you need to know:
- Payment Variety: Some states still have traditional booths with people to take your cash, but many have switched to “Open Road Tolling.”
- Pay-By-Plate: Many states will just scan your license plate and send a bill to your home address. Don’t ignore these! They often come with late fees if not paid quickly.
- Proactive Paying: When we got home, I did a “toll audit.” I checked the websites for the states I knew we drove through (like New York, Illinois, or Massachusetts) to see if we had any outstanding electronic tolls.
💸Holly’s Pro-Tip: Don’t wait for the mail. If you know you went through an electronic toll, check the state’s tolling website 48 hours later. You can usually pay online with your license plate number before they even send the bill. It saves you the stress of a surprise letter a month later!
Have a question about your next trip? Holly Would Know!
Shoot me a message or check out more travel guides on the main page.

Leave a Reply